Enablement as an electronic biller on the DIAN portal (Previous Validation)
NOTE: Before starting the ENABLEMENT process, it is necessary to have the RUT updated, because access to the platform comes to the email address you have registered in the RUT.
 DEMO
DEMO
Fully internal testing environment.
 Registration and Initial Validation
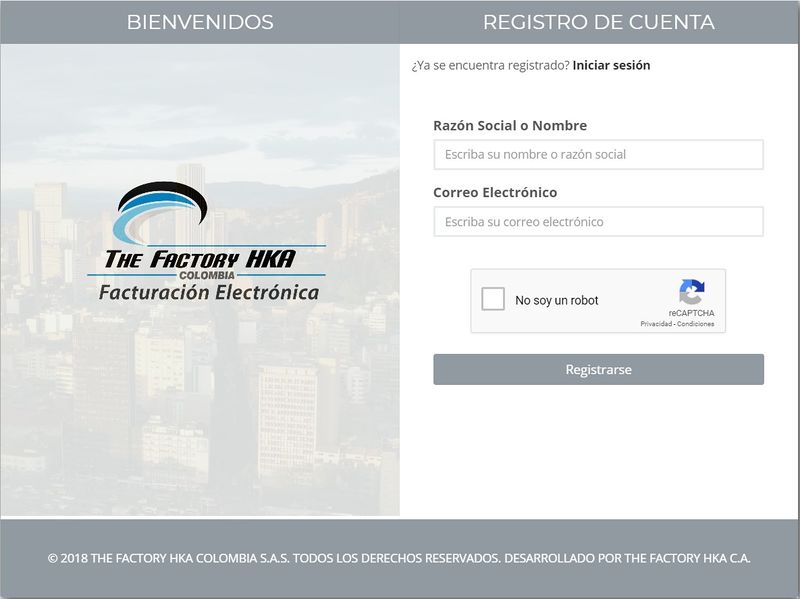
Step 1:
Enter the link: https://demofactura.thefactoryhka.com.co
To register you must fill out the following fields:
- Company Name or Name
To finish, validate the reCAPTCHA confirmation and press the register button.
Step 2:
Once registration is completed, a message is generated indicating that an email was sent to activate your account.
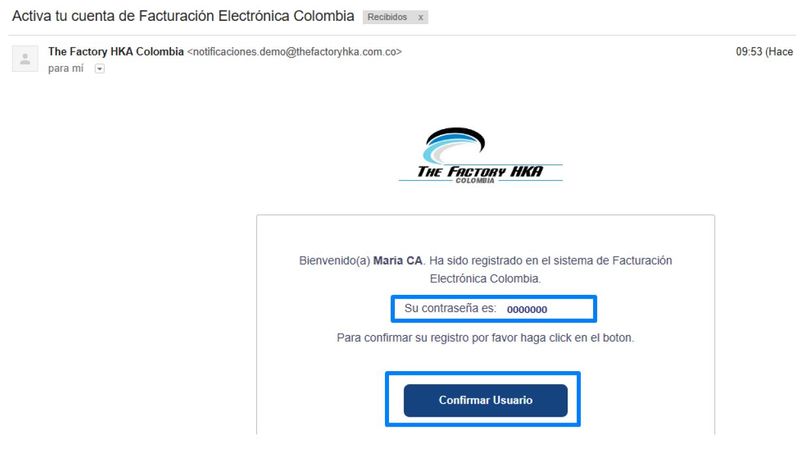
The email received contains the password and the link that will redirect the user to the main screen where a message is displayed indicating that the account has been confirmed and that they can enter the system. See image 1.1.
Note: You must activate your account before you can log in. If you do not activate your account, the system will not allow you to log in. Consider that you have 24 hours to activate the account, otherwise your registration option will expire.
For more information you can watch the following video
 Login to the System
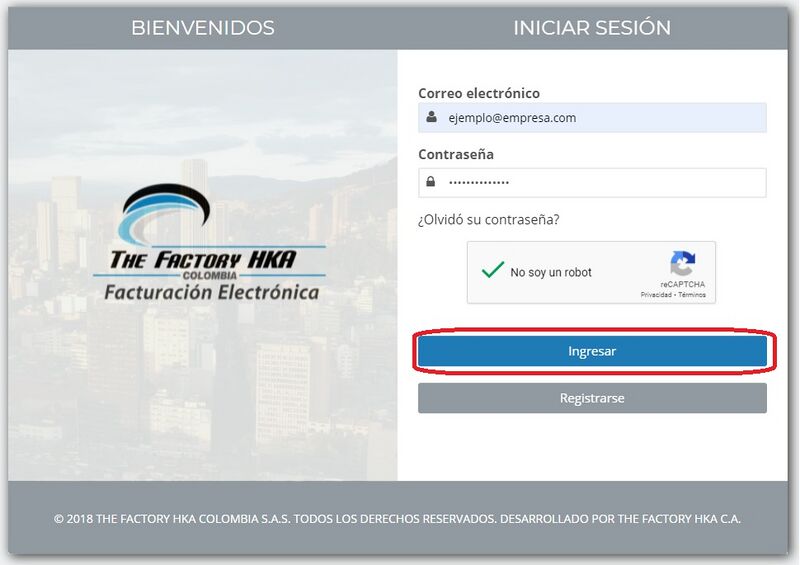
To enter the DFactura portal you must enter the email and password received. See image 1.2.
For more information you can watch the following video
 DEMO Migration to Production
- From the Project Area it will be verified if you meet the following requirements:
- Billing and Payment Management completed
- Digital Certificate issued
- Registered user on the DEMO Prior Validation Platform. It is recommended to have rehearsed the different billing scenarios present in your operation in the DEMO Environment.
- Integrated Software House (applies to clients who will invoice electronically through an Accounting System allied to The Factory HKA)
Failure to meet all requirements as listed may mean delays in the process.
If you have all the requirements, you can request the transfer to Production. To do this you must fill out the following Form
ATTENTION
- You must keep in mind that when performing the Migration from DEMO to Production, the following information IS NOT MIGRATED:
- Customers
- Products
- Units of measurement
- Establishments
- Only migrated from DEMO to Production:
- Tax Data.
- Logo.
- Digital certificate.
 Production - In the process of Enabling
In the Prior Validation production environment, in the Production - In the process of Qualification phase, is where we carry out the DIAN qualification tests, which are necessary for the DIAN to authorize them to be billers. electronics.
 Enter the DIAN Portal
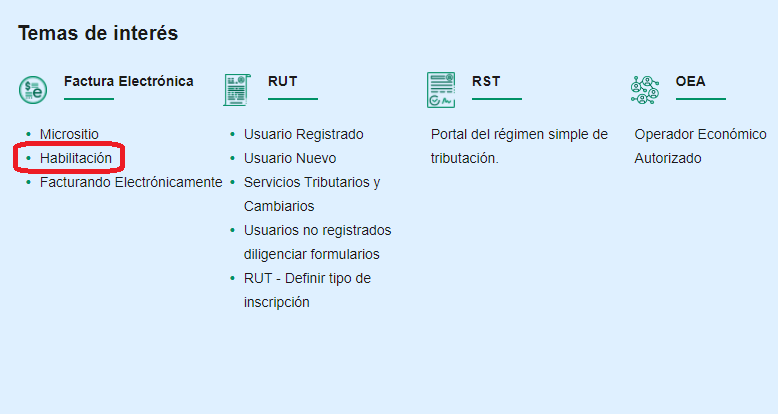
Initially you must enter the DIAN page www.dian.gov.co and click on the ENABLEMENT button. (See Image 2.1)
 Enter the Prior Validation registration platform
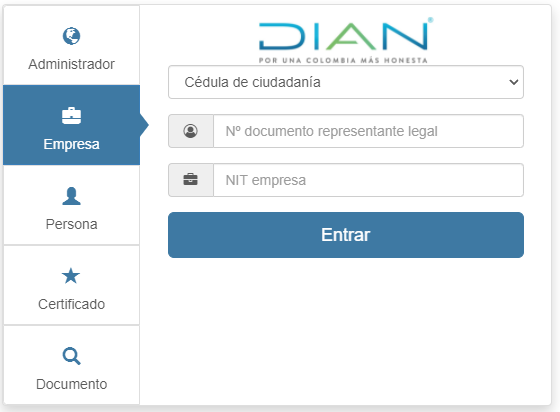
 Enter as Company
Select the type of document, the document number and the company's NIT. (See Image 2.2)
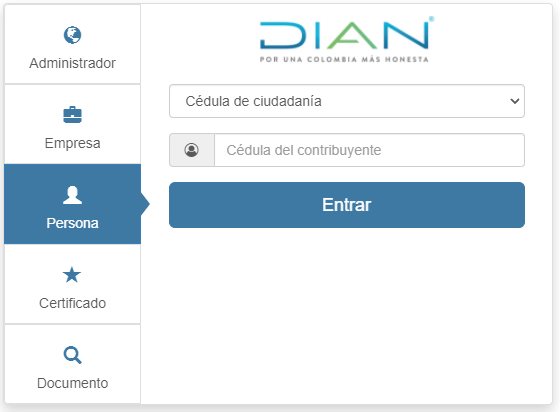
 Enter as Person
You must select the type of document and enter the person's document number. (See Image 2.3)
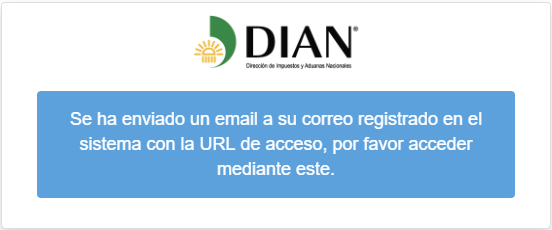
For both cases, once the information entered by the user has been validated and it is verified that there is a citizenship or immigration card with the identity document number entered, in addition to verifying that the user is not a robot, the system will send a message to the email email from the legal representative of the company with a link to enter the web portal. (See Image 2.4)
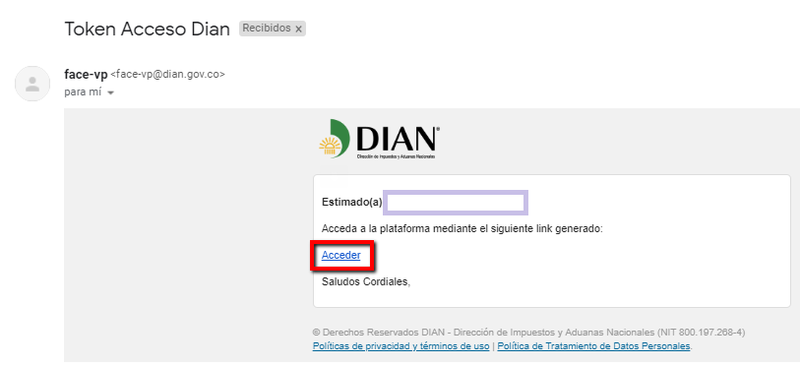
Once the email arrives, you must click Access. (See Image 2.5)
 Registration as an Electronic Biller in the DIAN Web Portal Prior Validation
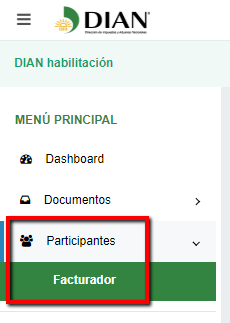
Once inside the platform you must enter Participants > Biller. (See Image 2.6)
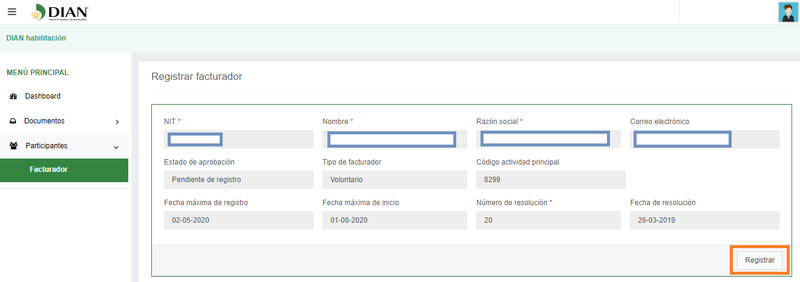
Next, all the data of the subject to be registered will be detailed, such as:
- NIT
- Name
- Business name
- Approval Status
- Biller Type
- Main Economic Activity Code
- The dates according to Resolution 20
After verifying the data, select Register. (See Image 2.7)
When you click on the Register button, the system will automatically show you a message indicating that if you are sure about performing this action, you should log in again. (See Image 2.8)

You must log in again for the registration procedure as a biller to be activated in the system.
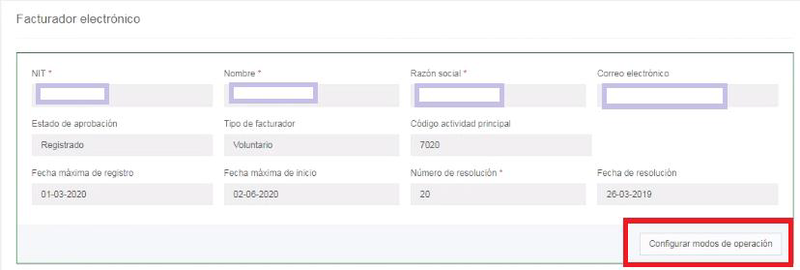
Enter the Participants > Biller option again and you will be able to Configure the Operation Mode. (See Image 2.9)
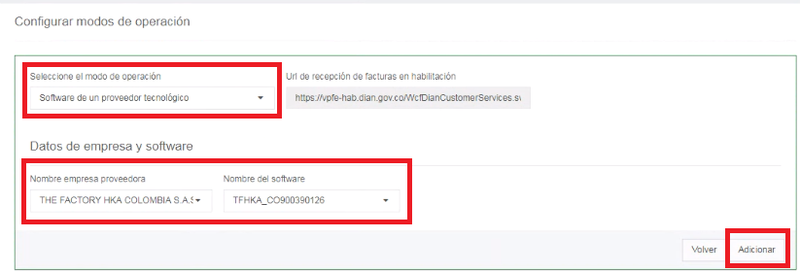
Now you must select the Mode of Operation which will be through a Technology Provider, in this case THE FACTORY HKA COLOMBIA SAS. (See Image 2.10)
After Adding the Operation Mode, you will see the list of the operation modes that you have associated with your account and the test ranges. Note: under the prior validation scheme, it is still contemplated to use various electronic billing solutions and various technology providers. (See Image 2.11 and 2.12)


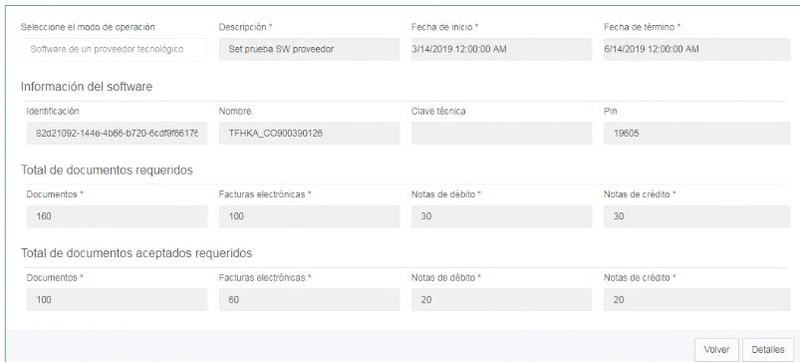
In the actions you will find the test set that the administrator has automatically assigned to you. By clicking on the icon you can see the details of the test set. (See Image 2.13 and 2.14)

In Image 2.14 you can see the amount of minimum tests that must be carried out regarding Invoices, Debit Notes and Credit Notes in order to receive authorization as an electronic biller.
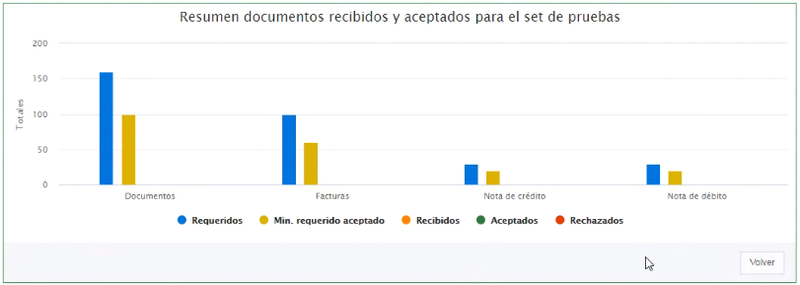
In case you want to see the Summary of documents received and accepted for the test set (successful and/or rejected documents) you can go to the details part. (See Image 2.15)
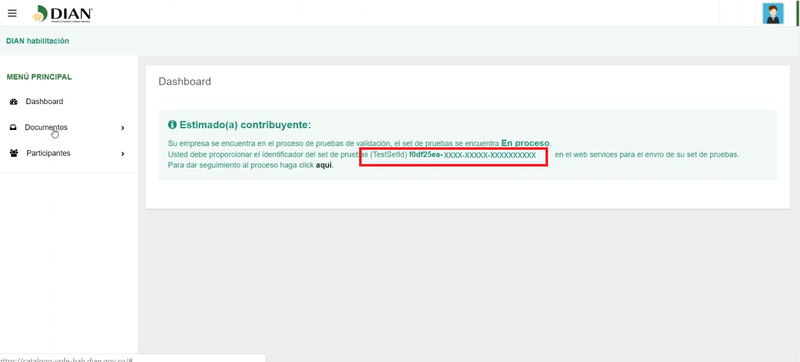
Another important piece of information for the enablement process is the TestSetId, this is found on the DIAN dashboard in a green message. (See Image 2.16)
 Test Set
The following video tutorial initially shows the differences between DEMO and PRODUCTION environment in the first part, in the second part the parameterization of the test sequentials is explained and where to obtain the necessary information to This process.
 Numbering Ranges Request
The request for prefixes and billing numbering ranges is made on the DIAN (MUISCA) website (https://muisca.dian.gov.co).
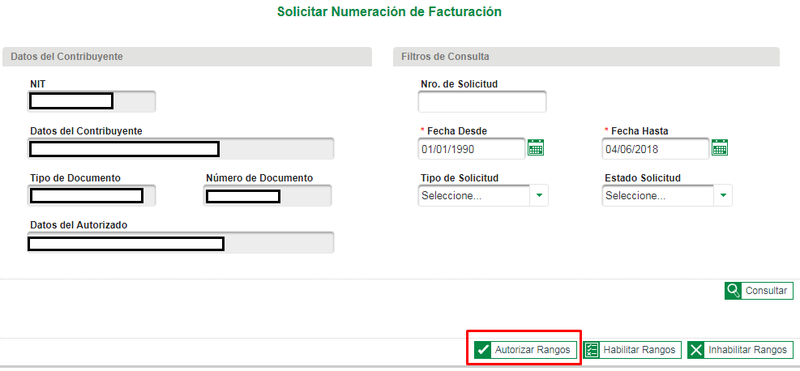
In the section Billing Numbering > Request Billing Numbering. (See Image 3.1)
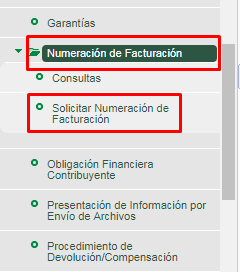
After passing through the automated messages that appear, you will reach the section where you will Authorize Ranks. (See Image 3.2)
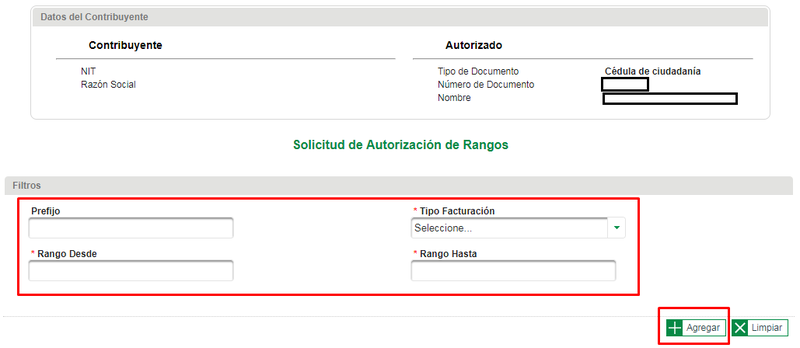
Then select:
- Prefix
- Range from
- Range up
In Billing Type, place ELECTRONIC, then click on "Add". (See Image 3.3)
When the Add button in the box above is pressed, a summary of the information provided will appear. (See Image 3.4)

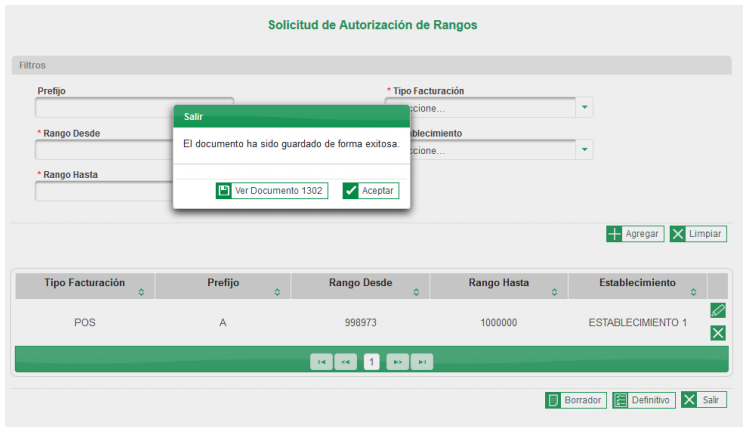
If the information is correct, click Draft, which generates format 1302 in Draft. (See Image 3.5)

A screen appears that allows you to “View the Document” and then accept it. (See Image 3.6)
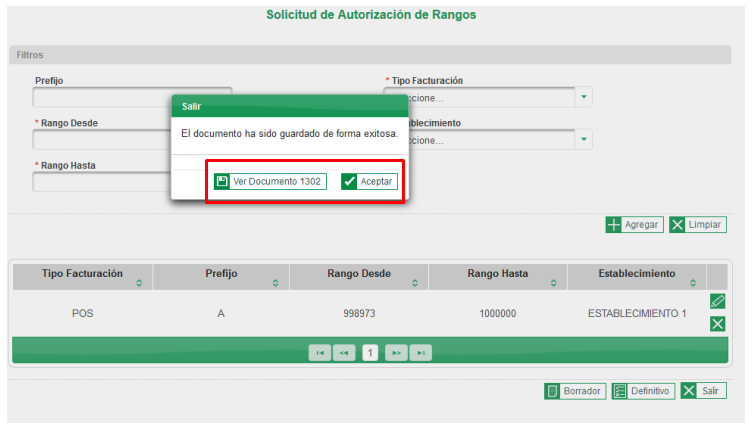
By clicking “Accept”, the Definitive button is enabled. (See Image 3.7)

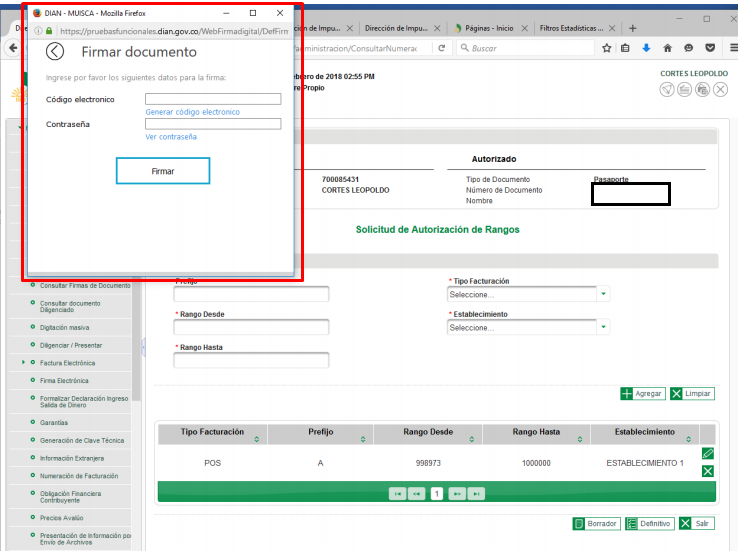
Once you click on the Definitive option, the window appears to sign the 1302 format. (See Image 3.8)
Then, the following screen appears to view document 1302 in “definitive” status, and click “Accept”. (See Image 3.9)
Once you click on “Accept”', the service sends you to the initial screen to sign form 1876. Remember that the process does not end until you sign form 1876 “Billing Numbering Authorization”. Click on the icon in the “Sign Authorization for Billing Numbering” box. (See Image 3.10)
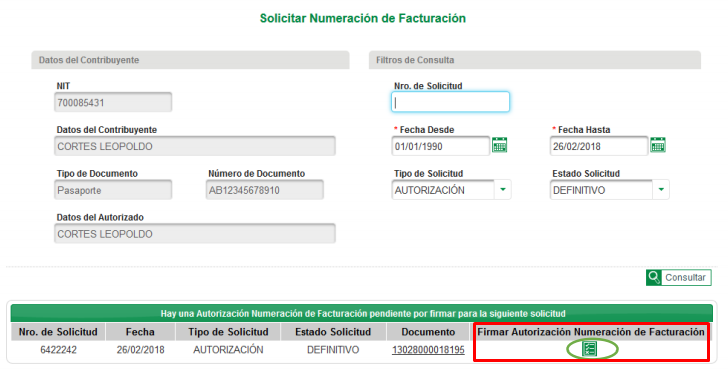
Finally, once the document is signed, format 1876 “authorization billing numbering” is generated with the watermark “AUTHORIZED”.
 Association of Numbering Ranges
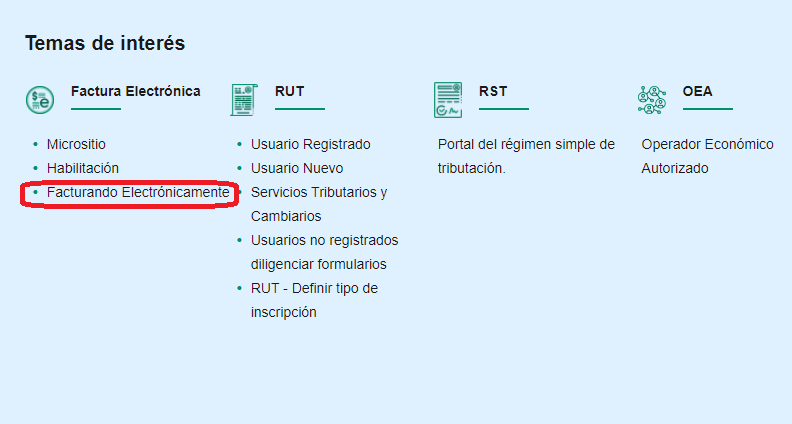
Once you have been successfully enabled by the DIAN, you must access the "Invoicing Electronically" panel to make the association of the prefixes. (See Image 4.1)'
In the left panel, locate the Settings > Numbering Ranges section. (See Image 4.2)
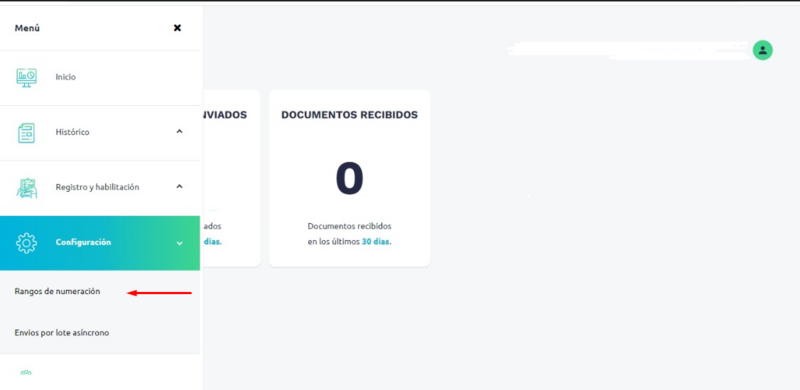
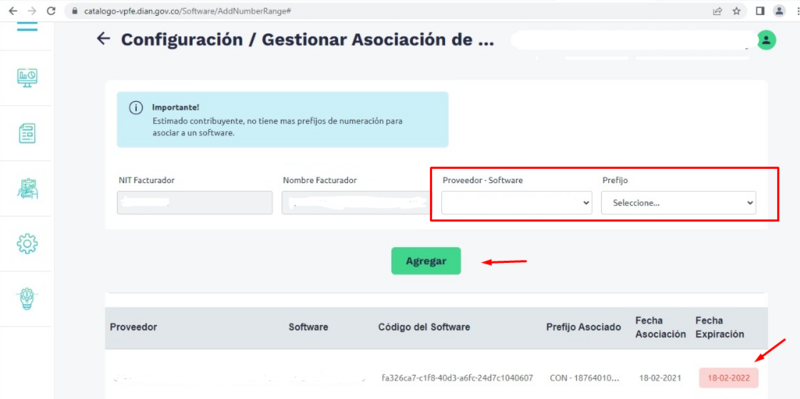
In this section, you can select the Supplier - Software of The Factory HKA Colombia SAS and select the Prefix that you want to associate. (See Image 4.3)
 Issuance of Electronic Invoices
At the end of the association of the Numbering Ranges, you must go to Portal 2.1 - Previous Validation of The Factory HKA Colombia SAS and parameterize the sequentials[1], this time selecting "Production 2.1" as Environment Type. Remember to add sequentials for Credit Notes and Debit Notes, because these are self-managed, they can have any prefix you want.
Once you have completed the parameterization of these sequentials, you will be able to start the billing process using the portal.